Installation
This guide covers installing Hydronia's desktop solver (RiverFlow2D or OilFlow2D) and enabling the corresponding QGIS plugin. HydroBID Flood installs the same way as RiverFlow2D; where the flow differs, it's called out.
System requirements
- OS: Windows 10 or 11 (64-bit). Windows 7 is legacy-supported but not recommended.
- Privileges: install as a user with local Administrator rights.
- QGIS: 3.40 LTR or later.
- Disk: 2 GB free for the solver and sample data.
Software installation
- Make sure you are logged in as a Windows Administrator.
- Download the installer from the link you received at purchase.
- Run the installer and accept the defaults.
- Reboot the computer before attempting to activate the license.
Reboot is required
Several licensing components only register with Windows after a restart. Activation will fail if you skip this step.
Activation
The software cannot run until a license is activated. Hydronia supports two licensing models:
- Standalone — one license, one computer, one activation.
- Network — one centralized license, multiple concurrent users on the same local network.
Pick the model that matches what you purchased and follow the Licensing page for the step-by-step procedure.
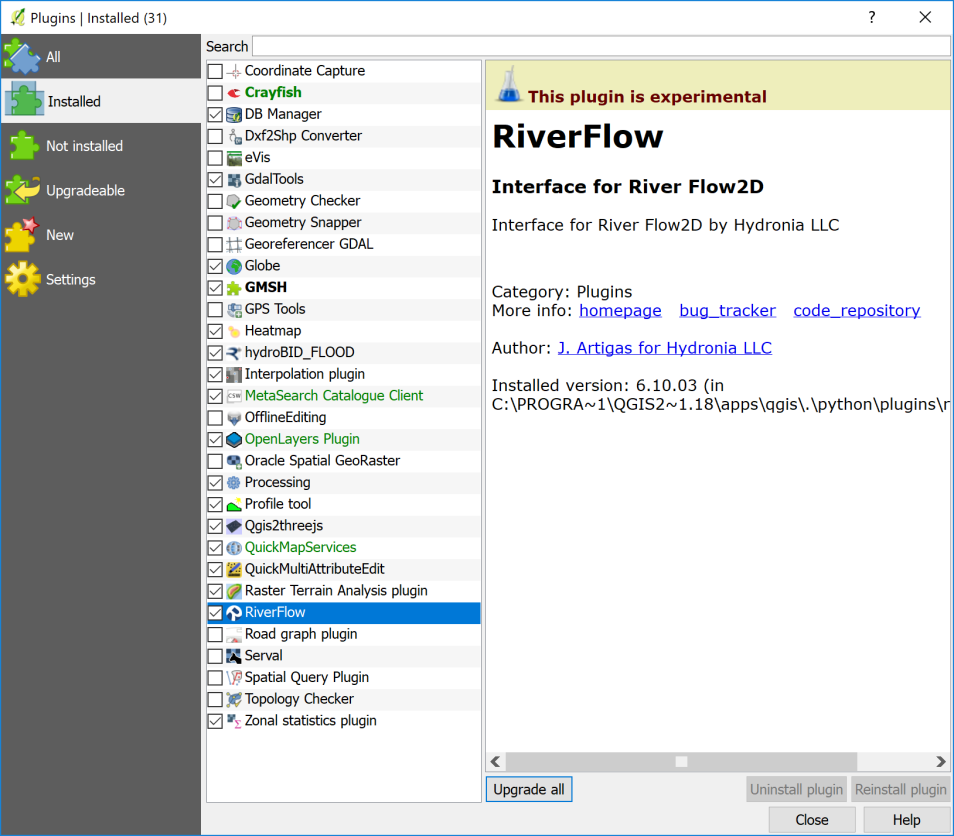
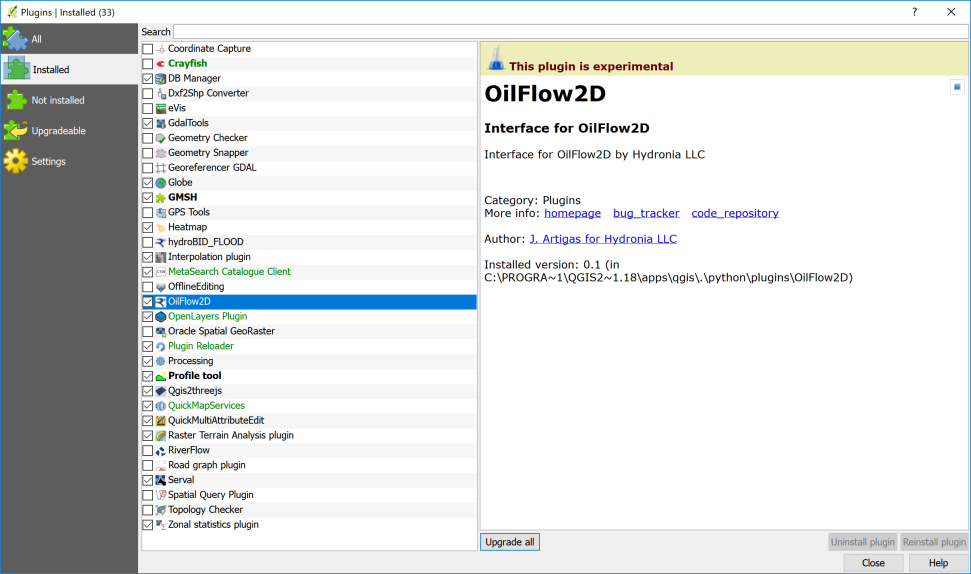
Enabling the QGIS plugin
Installing the solver does not automatically enable the QGIS plugin. You need to enable it once, per QGIS profile:
- Launch QGIS.
-
Open Plugins → Manage and Install Plugins.
-
In the Installed tab, locate the plugin (RiverFlow2D, OilFlow2D, or HydroBID Flood) and tick its checkbox.
-
Close the dialog. The plugin's toolbar appears immediately in QGIS.
If the plugin is not listed under Installed, the installer did not register it correctly — re-run the installer as Administrator and reboot again.
Enabling RiverFlow2D in Aquaveo SMS
If you use Aquaveo's SMS in addition to QGIS, the solver can be registered as a generic model:
- Run SMS.
- Edit → Preferences, open the File Locations tab.
- Scroll to Model Executable → Generic.
- Browse to the RiverFlow2D install folder — typically
C:\Program Files\Hydronia\RiverFlow2D— and selectRiverFlow2Dm4.exe. - Click OK to close the preferences dialog.
Troubleshooting
- The installer fails part-way — re-run as Administrator. Temporary folders left by a failed install are cleaned up on retry.
- The plugin's toolbar doesn't appear after enabling the plugin — QGIS sometimes needs to be restarted. Close all QGIS windows and relaunch.
- The desktop shortcuts are missing — they're created under the installing user's profile only. Re-run the installer under the account that will actually use the software.
Report any installation error message to support@hydronia.com.
Finding your license file
If support asks you to share your license details, the activation files are:
- Standalone:
C:\ProgramData\AVU\RF2DA.ini - Network License Server:
C:\Program Files\Hydronia\LicenseManager\RF2DA.ini
The file usually looks like this in Notepad:
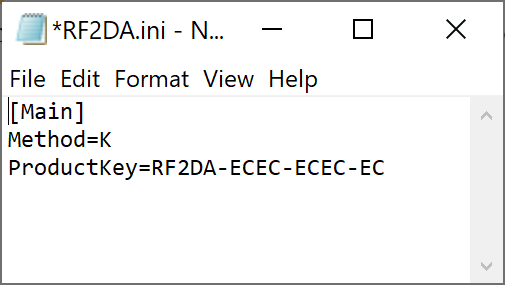
Open with Notepad and send the contents to support — never share these files in public channels.