Advanced digitization/snapping
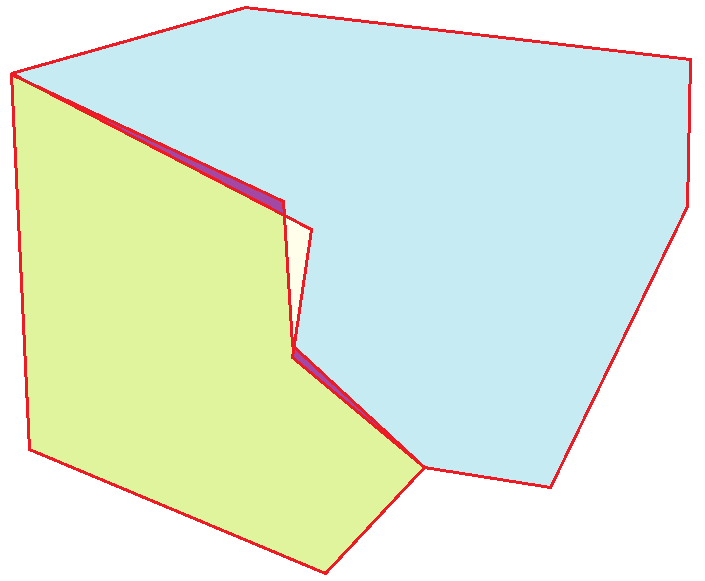
In many cases the drawing of polygons that share borders (contiguous) is required. Trying to do this manually usually produces polygon overlap errors, or it may generate gaps as illustrated in the following figure:
This tutorial illustrates how to use the QGIS Snapping tool to facilitate the scanning of adjacent polygons. The procedure includes the following steps:
-
Open an existing RiverFlow2D project.
-
Activate the Snapping tool.
-
Configure the Snapping tool
-
Draw contiguous or adjacent polygons using the Snapping tool.
::: shaded The files required to follow this tutorial can be extracted from the 'ExampleProjects' zip file under the 'SnappingTutorial' folder. This zip file is downloaded separately from your installation materials. :::
Open an existing project
-
Open QGIS
-
In the main menu go to Project \(\rightarrow\) Open... browse to the existing project: 'SnappingTutorial.qgz'.
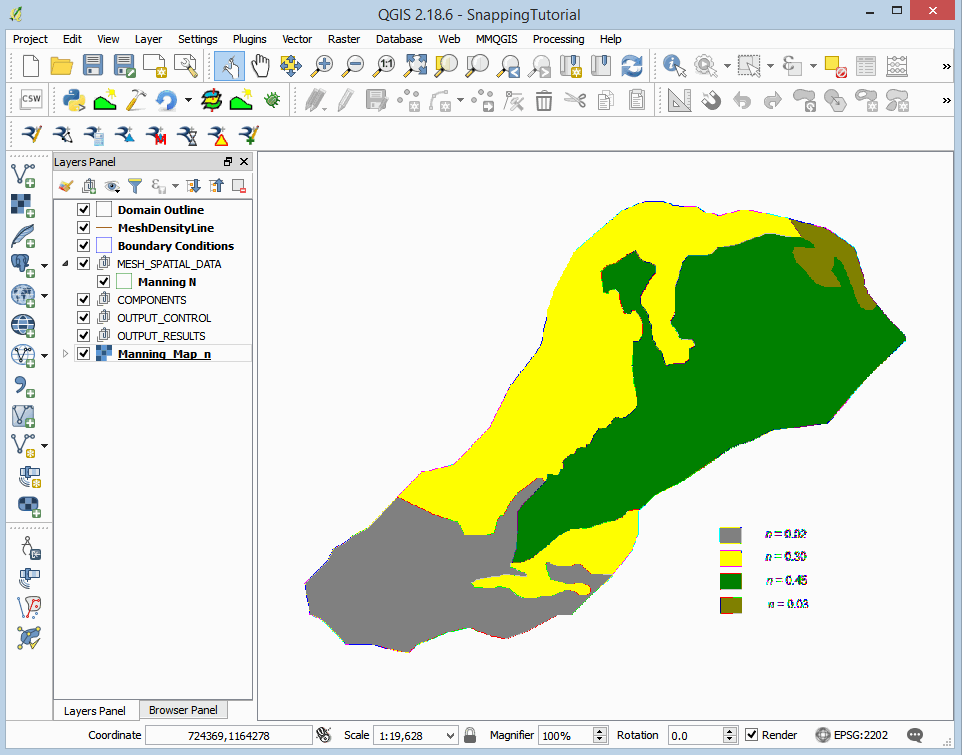
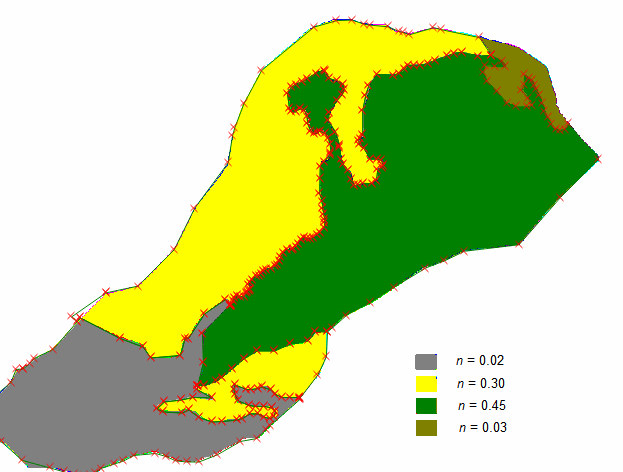
This project contains the basic templates of a RiverFlow2D project and a raster with 4 areas with different Manning's n coefficients derived from land cover and land use maps. From this raster, the polygons of the Manning N layer will be drawn. When the project is opened, a project image will be loaded in QGIS as shown in Figure 18.2.
Activate and configure the Snapping tool
To use the Snapping tool, you must activate it beforehand:
-
Open the configuration options window: In Project menu \(\rightarrow\) Snapping Options...

-
In the Project Snapping Settings window, click on the Enable Snapping button.

-
Next to the Enable Snapping button the dropdown menu for All Layers is activated. Click on the dropdown and select Advanced Configuration.
-
In the list of layers, make sure only Manning N layer is selected.
-
Select the checkbox to Avoid Overlap on the Manning N layer.
The configuration window of the Snapping tool should be as shown in the following Figure:

Draw contiguous or adjacent polygons using the Snapping tool
To draw the polygons with the information of the Manning's n coefficients we proceed as follows:
-
Edit the Manning N layer: In the layers panel, select the Manning N layer
-
In the digitalization toolbar click on the Toggle Editing button

A pencil icon will appear in the Manning N layer indicating that the layer is in edit mode:

-
Draw the polygon that demarcates the Manning's n area: Using the Add Toggle Editing button in the digitalization toolbar

proceed to draw the polygons. Start by drawing the polygon in the bottom of the watershed shown in gray which corresponds to n = 0.02. After completing the drawing you should have an image similar to the one shown in the following figure:
-
Proceed to draw the second polygon. This will be the small yellow polygon to which corresponds to n = 0.30. To draw the polygon, follow the boundary with the green polygon as indicated by the raster, but in the boundary with the polygon already drawn (the gray) an overlap will be made so that the snapping tool takes the edge that already exists and completes the polygon. Try to make a path as shown in the figure below:
-
Right-click to finish the drawing.
-
Enter the Manning coefficient, n = 0.30 and you will have an image like the one shown below where you can see how the final drawing of the second polygon took the vertices of the first adjacent polygon:
-
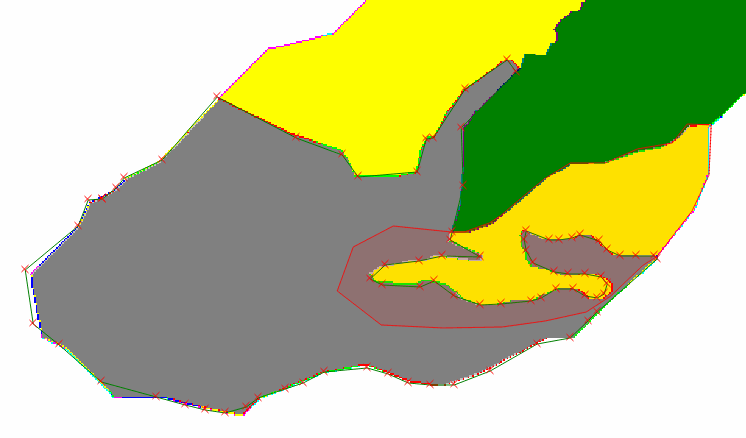
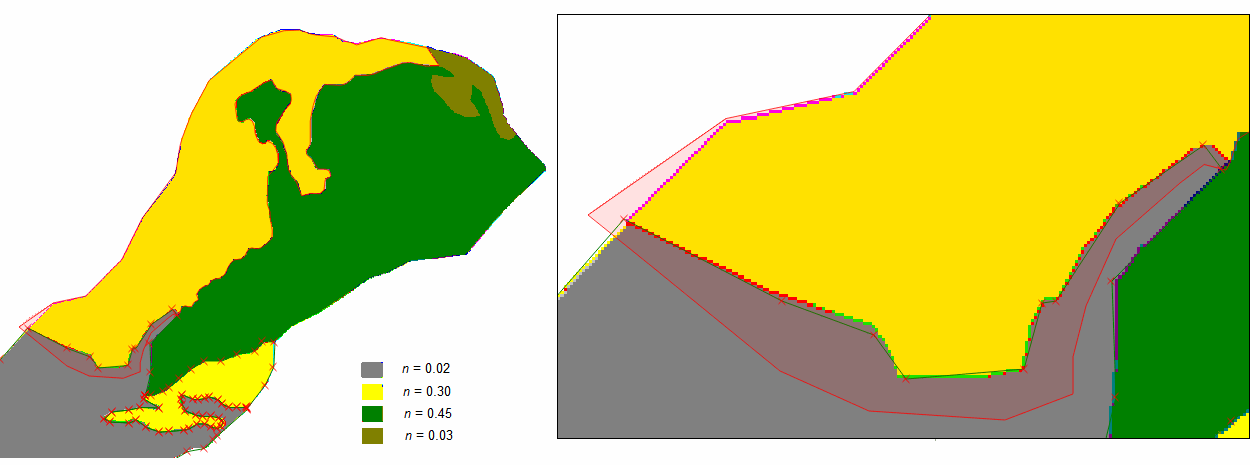
The third polygon to be drawn will be the large yellow polygon. Just as in the previous case, the contour of the polygon according to the raster is faithfully followed, but in the adjacent polygons it is already drawn overlapped. The figure below shows the initial drawing, with an approach in the area where the overlap is made with the existing polygon:
-
After finishing the drawing and assigning the Manning N umber to the polygon, the final drawing of the third polygon will be shown as shown below:
-
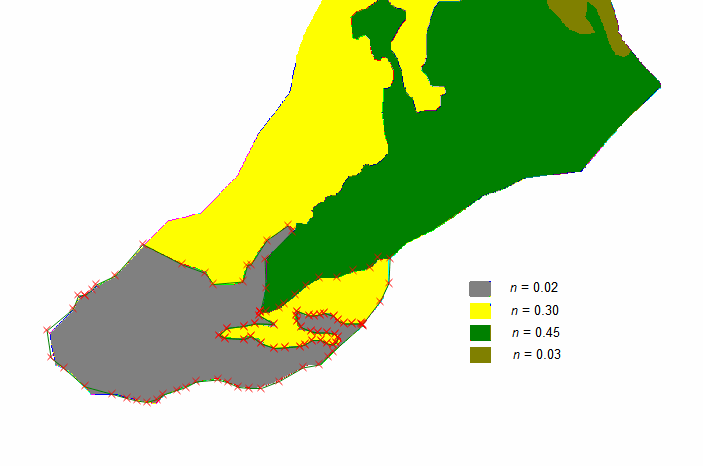
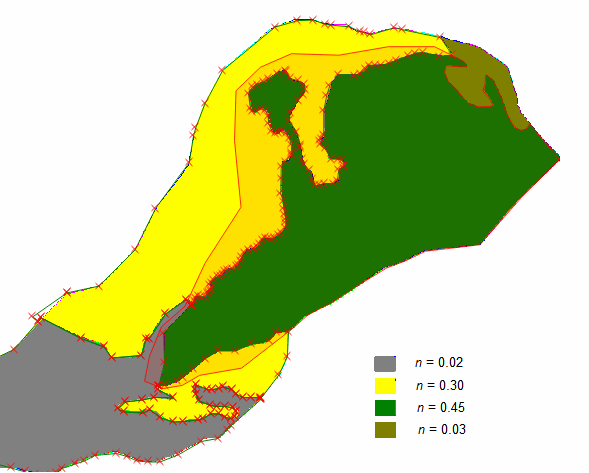
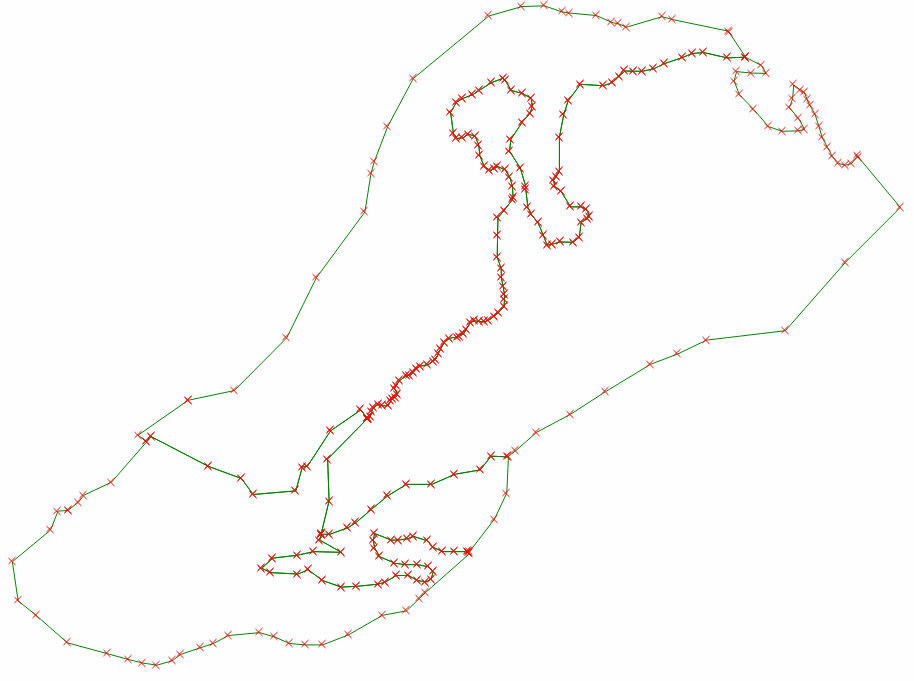
The fourth polygon to draw will be the green polygon which corresponds to n = 0.45. To do it will follow the outer boundary of the same and the boundary with the brown polygon. Then a thick overlap will be made within the polygon already drawn, the yellows and the gray, as shown in the figure below:
-
After finishing the drawing and assigning the Manning's n value to the polygon, you will have the final layout of the third polygon as shown below:
-
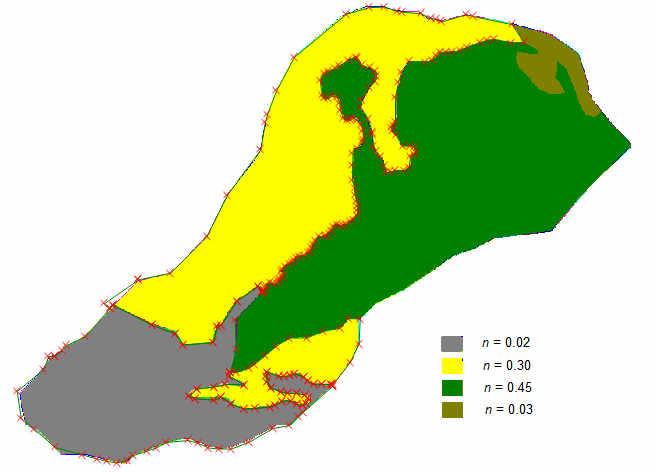
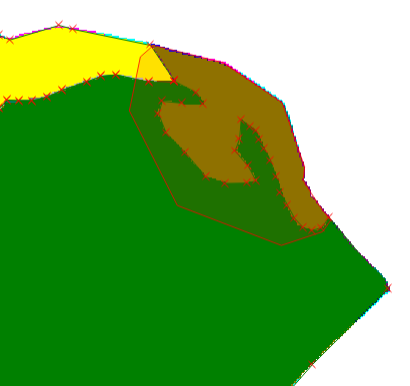
To finish, draw the fifth polygon of brown color, which corresponds to n = 0.03. For this the outer limit is drawn following the contour of the raster and for the shared limits an overlap is made inside the neighboring polygons as shown in the figure below:
-
After finishing the drawing and inputting the Manning coefficient to the polygon, you will have the final drawing of the third polygon as shown below:
-
To finish, click on the Toggle Editing button
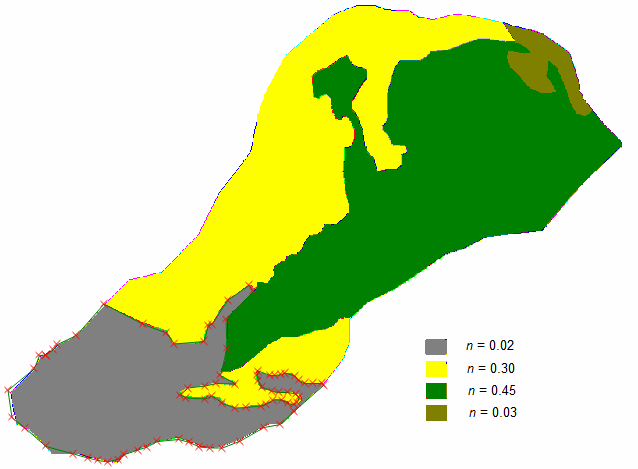
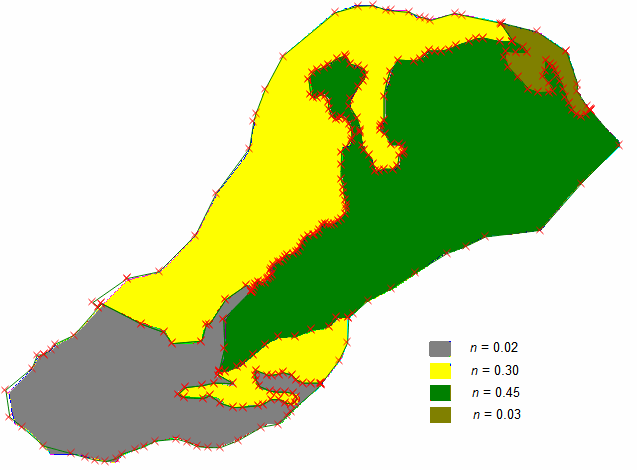
changes are accepted and saved. Then the layer of the raster Manning_Map_n is deactivated, and the Manning N vectorized layer can be observed as shown in the Figure below:

Delete a polygon
Suppose you want to delete the last polygon created because you are not satisfied with the result. In that case you can proceed doing as follows:
-
The Manning N layer is edited using the Toggle Editing button
-
Then the polygon to be eliminated is selected using the Select Feature button

-
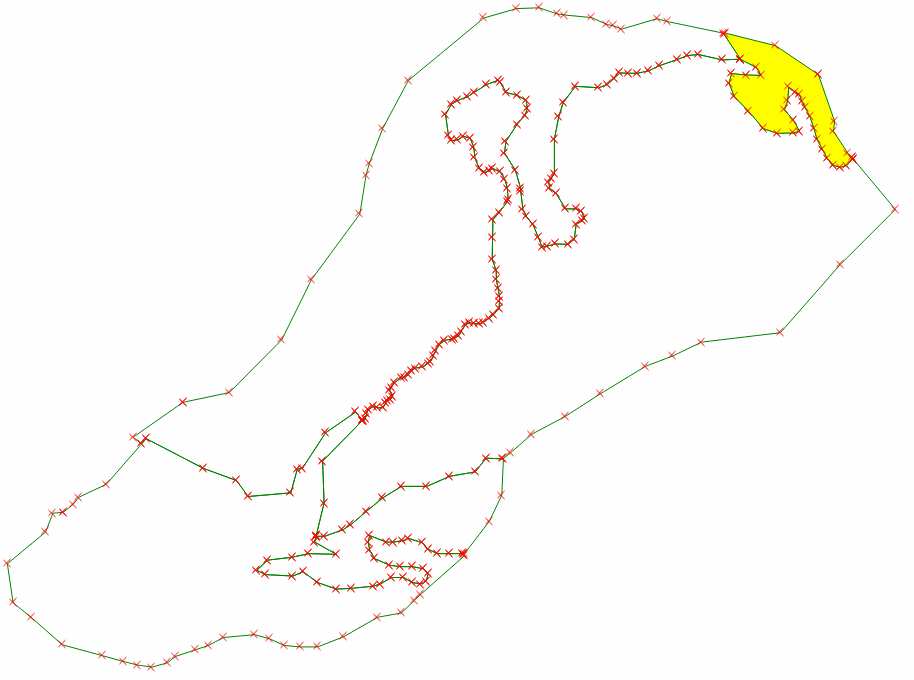
With the active select Feature tool, click on the polygon to be deleted and it will be highlighted in yellow to indicate that it is selected (Figure 18.15).
-
Then the polygon is deleted either with the Delete key on the keyboard or with the Delete selected button

-
Finally, the changes are saved and the editing mode of the layer is deactivated by clicking on the Toggle Editing button.
This concludes the Snapping tutorial.