Establishing initial water, mud, or tailings elevations
Sometimes it is practical to use a raster layer to establish the initial condition of the water surface elevation (Initial WSE). For instance, when modeling tailings dam breaks, it is often necessary to define the initial surface of the tailings behind the dam.
This tutorial illustrates how to use a raster file that contains the initial elevations of the fluid contained by a dam with the purpose of simulate a dam breach and determine the fluid runout after the dam collapses.
The procedure of modeling a dam-breach using an initial condition of fluid surface elevation involves the following steps:
-
Open an existing RiverFlow2D project.
-
Import a raster layer with the initial values of the water surface elevation (WSE).
-
Export the files to RiverFlow2D by setting the option to use the raster layer with the Initial WSE.
The files used in this tutorial can be found in the following directory:
'Documents\Hydronia\RiverFlow2D\ExampleProjects\initalWSE_RasterTutorial'
Open an existing RiverFlow2D project
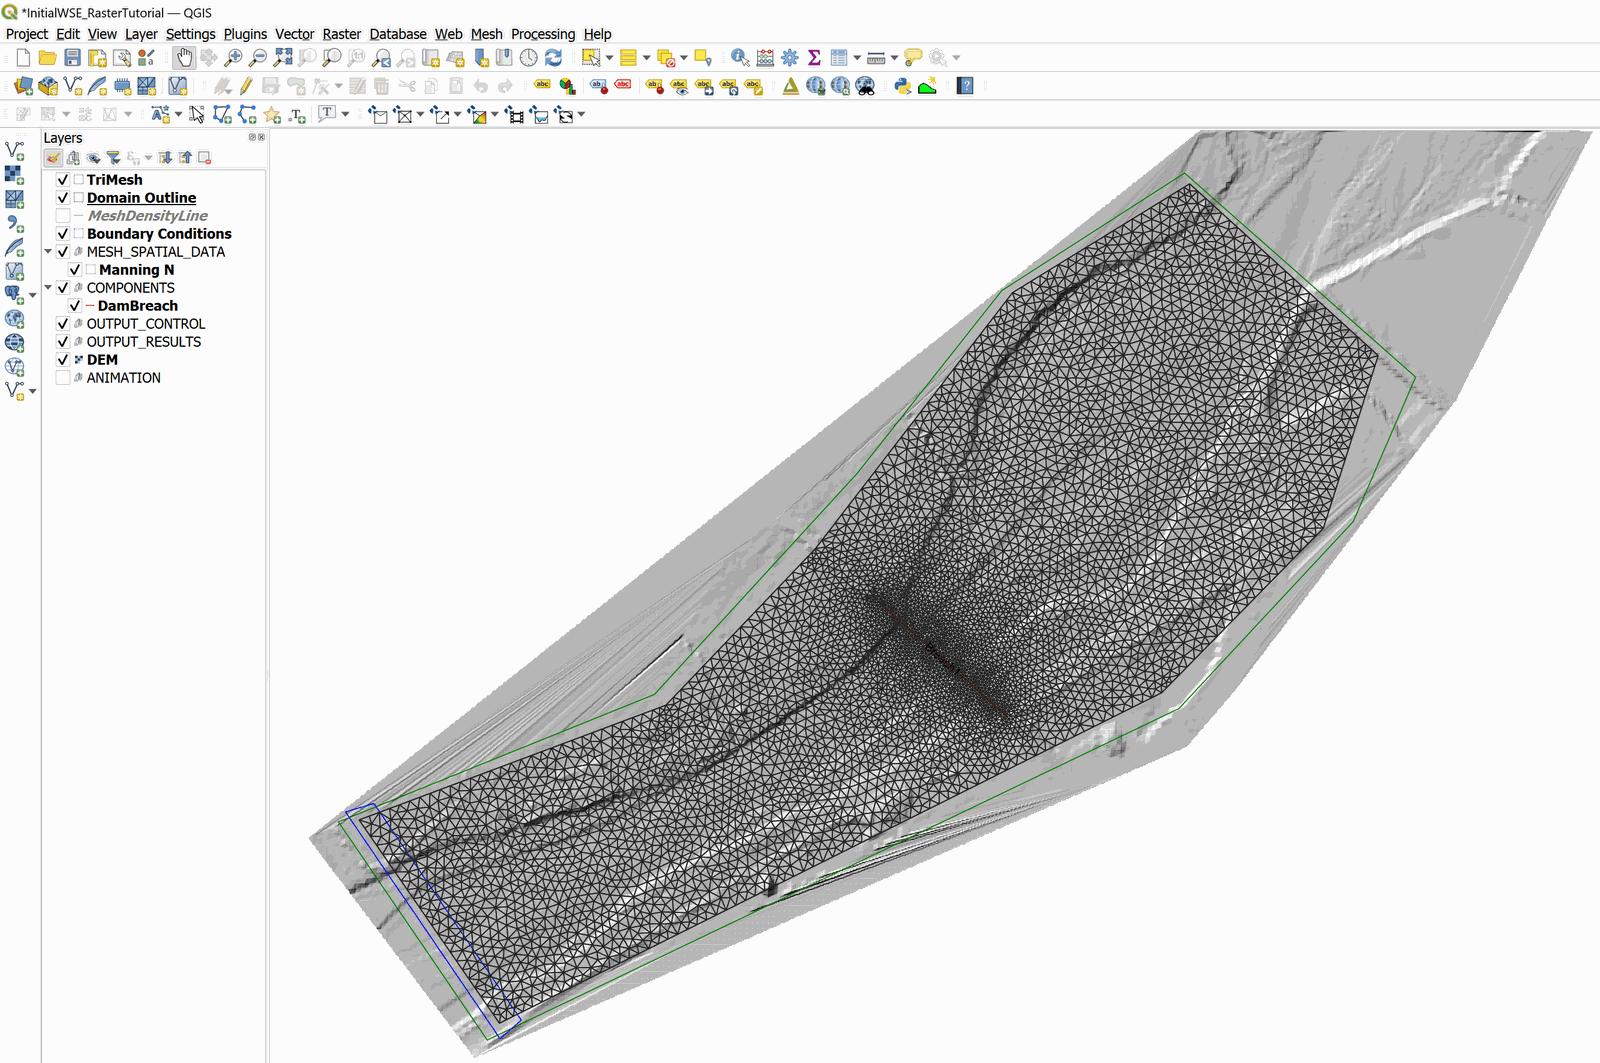
Start QGIS and in the Project, use the Open... command to load the existing project: 'InitialWSE_RasterTutorial.qgs'. The project corresponds to a model of a dam breach with an initial elevation of the fluid surface that is not horizontal but varies in space.
When you open the project you will have an image of the project loaded in QGIS as shown in the Figure 8.1.
Importing the Initial WSE raster layer
The procedure to import the Initial WSE raster layer to the project includes the following steps:
-
Open the ASCII grid file representing the initial condition elevations clicking on on the Add Raster Layer button
 and selecting the 'InitiaWSE_r.tif' file.
 -
Confirm the CRS 2229 projection that will be used for this layer
-
If necessary, move the new layer under the group MESH_SPATIAL_DATA. You should have an image on the screen like the one shown below:
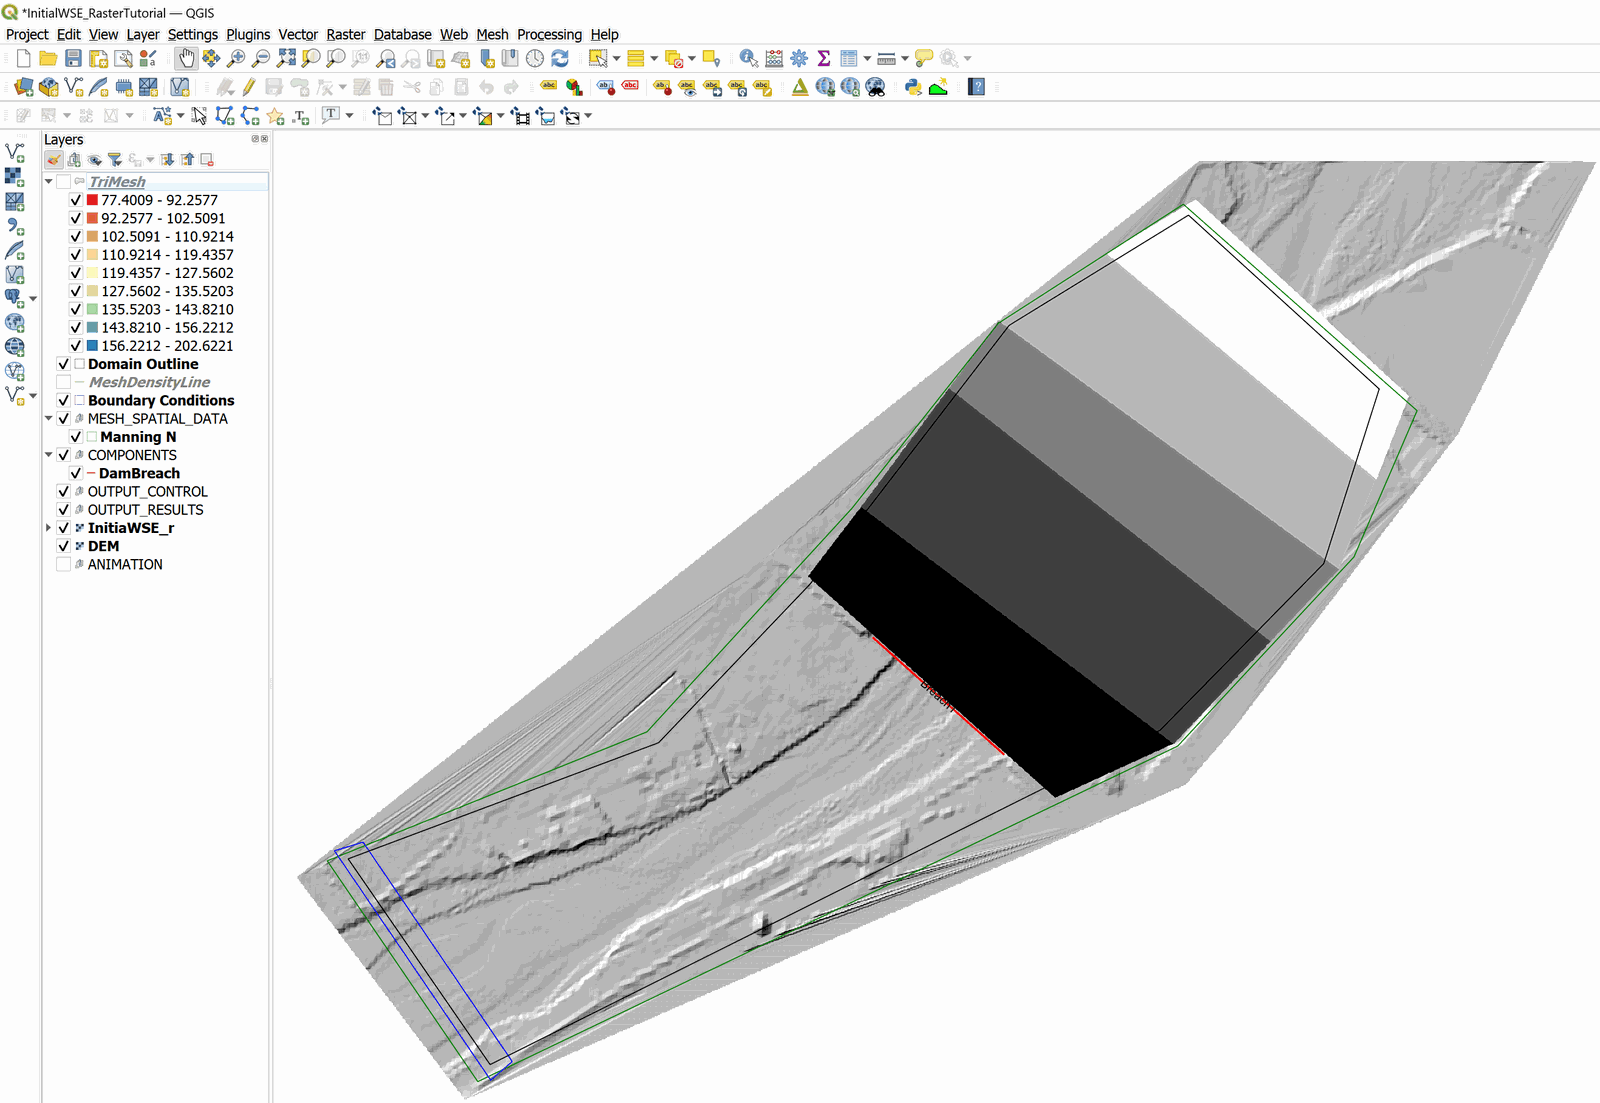
The image shows the InitialWSE_r raster layer in grays gradient where there is a change in the WSE ranging from 135.0 to 135.4 ft.
::: shaded The window above has the Trimesh layer disabled for clarity. Re-enable it for the export process in the next section. :::
Exporting files to RiverFlow2D
-
Export the files in the format required by the RiverFlow2D using the Export to RiverFlow2D plugin. When executing the plugin a window like the one shown in the Figure 8.3 is shown.
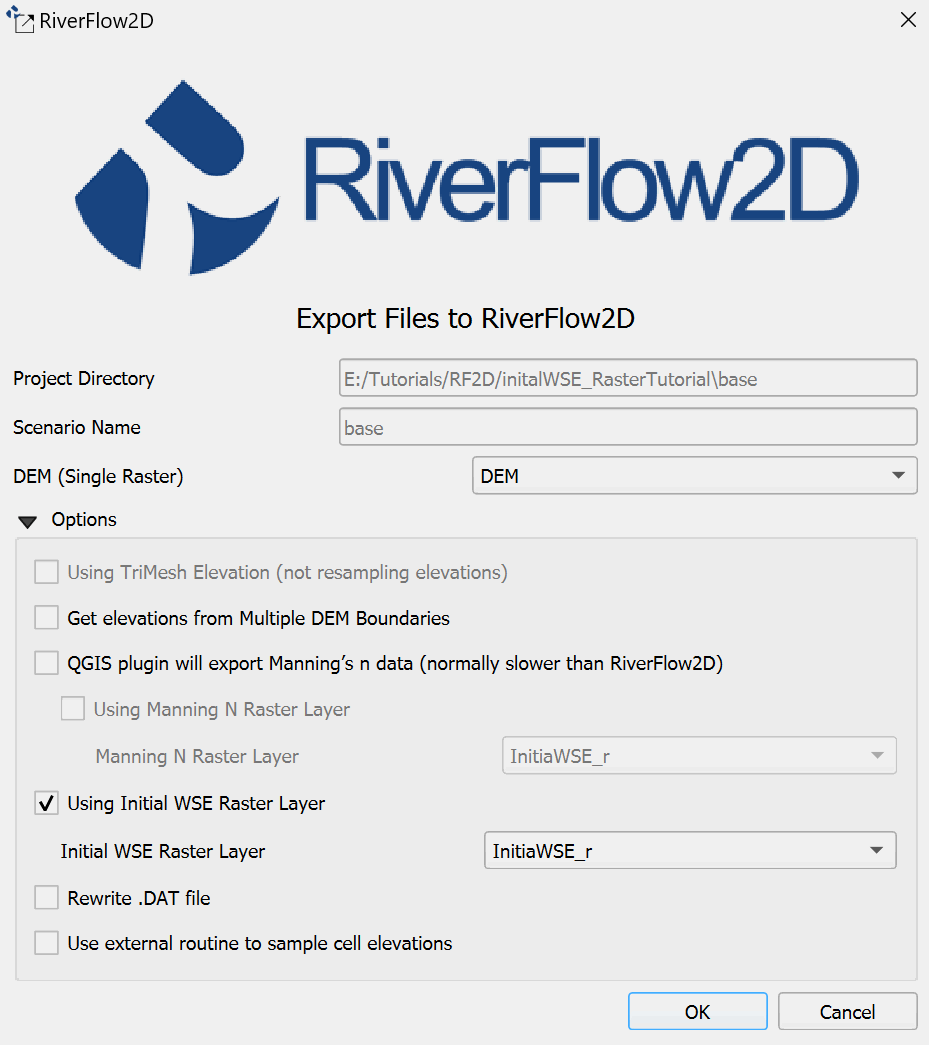
As shown in the figure, click the Options arrow to display the group of options that appear hidden by default.
-
Select the DEM raster in the DEM (Single Raster) drop down.
-
Check the box Using Initial WSE Raster Layer. Select the InitialWSE_r layer from the drop-down list.
-
Click OK button and the export process will begin.
From this point on, You can refer to the Dam Breach tutorial to continue with the modeling of the dam breach.